Causes and solutions of workpiece deformation in machining center
1. The material and structure of the workpiece will affect the deformation of the workpiece
The amount of deformation is directly proportional to the complexity of the shape, aspect ratio and wall thickness, and proportional to the rigidity and stability of the material. Therefore, the influence of these factors on the deformation of the workpiece is minimized when designing parts. Especially in the structure of large parts, the structure should be reasonable. Before processing, the hardness and porosity of the blanks should be strictly controlled to ensure the quality of the blanks and reduce the deformation of the workpiece.

2. Deformation caused by workpiece clamping
When clamping the workpiece, first select the correct clamping point, and then select the appropriate clamping force according to the position of the clamping point. Therefore, make the clamping point and the support point as consistent as possible, so that the clamping force acts on the support, the clamping point should be as close as possible to the processing surface, and the selected position is not easy to cause clamping deformation. When there are clamping forces in several directions on the workpiece, the order of the clamping forces should be considered. The clamping force should be applied first to make the workpiece contact the support, and it is not easy to be too large. The main clamping force for balancing the cutting force , Should act later.
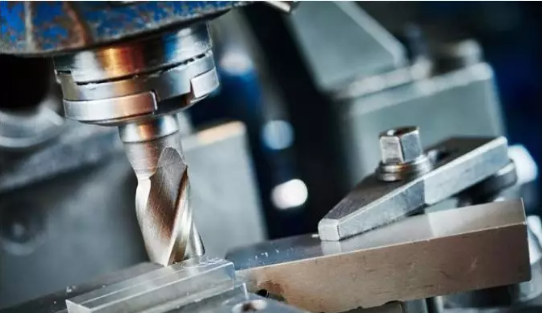
Secondly, it is necessary to increase the contact area between the workpiece and the fixture or use the axial clamping force. Increasing the rigidity of the parts is an effective way to solve the clamping deformation, but due to the characteristics of the shape and structure of the thin-walled parts, it has a lower rigidity. In this way, under the action of clamping force, deformation will occur. Enlarging the contact area between the workpiece and the fixture can effectively reduce the deformation of the workpiece during clamping. For example, when milling thin-walled parts, a large number of elastic press plates are used to increase the force area of the contact parts; when turning the inner diameter and outer circle of the thin-walled sleeve, whether it is a simple split transition ring or an elastic mandrel , Full-arc jaws, etc., are used to increase the contact area when the workpiece is clamped. This method is conducive to bearing the clamping force, thereby avoiding the deformation of the parts. The axial clamping force is also widely used in production. The design and production of special fixtures can make the clamping force act on the end surface, which can solve the bending deformation of the workpiece due to the thin wall and poor rigidity of the workpiece.

3. Deformation caused by workpiece processing
Due to the cutting force during the cutting process, the workpiece produces elastic deformation in the direction of the force, which is what we often call the phenomenon of giving up the knife. Corresponding measures should be taken on the tool to deal with this kind of deformation. The tool needs to be sharp during finishing. On the one hand, it can reduce the resistance caused by the friction between the tool and the workpiece, and on the other hand, it can improve the heat dissipation capacity of the tool when cutting the workpiece, thereby reducing the workpiece The residual internal stress.
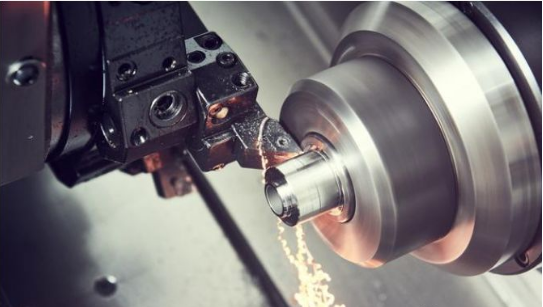
For example, when milling large planes of thin-walled parts, single-edge milling is used, and the tool parameters select a larger entering angle and a larger rake angle in order to reduce cutting resistance. Because this kind of tool cuts lightly and reduces the deformation of thin-walled parts, it is widely used in production. In the turning of thin-walled parts, a reasonable tool angle is very important to the cutting force during turning, the thermal deformation generated during turning, and the microscopic quality of the workpiece surface. The size of the rake angle of the tool determines the cutting deformation and the sharpness of the rake angle of the tool. A large rake angle reduces cutting deformation and friction, but too large a rake angle will reduce the wedge angle of the tool, weaken the tool strength, poor heat dissipation of the tool, and accelerate wear. Therefore, generally when turning thin-walled parts of steel materials, use high-speed tools with a rake angle of 6°-30°, and a cemented carbide tool with a rake angle of 5°-20°. The clearance angle of the tool is large, the friction force is small, and the cutting force is correspondingly reduced, but too large clearance angle will also weaken the tool strength. When turning thin-walled parts, use high-speed steel turning tools. The back angle of the tool is 6°~12°. With cemented carbide tools, the back angle is 4°~12°. For fine turning, use a larger relief angle. Rough turning When taking the smaller back angle. When turning the inner and outer circles of thin-walled parts, take a large entering angle. The correct choice of tools is a necessary condition to deal with the deformation of the workpiece.
The heat generated by the friction between the tool and the workpiece will also deform the workpiece during processing, so high-speed cutting is often selected. In high-speed machining, because the chips are removed in a relatively short time, most of the cutting heat is taken away by the chips, reducing the thermal deformation of the workpiece; secondly, in high-speed machining, the softening of the cutting layer material is also reduced. It can reduce the deformation of parts processing and help ensure the accuracy of the size and shape of the parts. In addition, the cutting fluid is mainly used to reduce friction during the cutting process and lower the cutting temperature. Reasonable use of cutting fluid plays an important role in improving tool durability, surface quality and machining accuracy. Therefore, in order to prevent parts from deforming, sufficient cutting fluid must be used reasonably.
Reasonable cutting amount used in machining is a key factor to ensure the accuracy of parts. When processing thin-walled parts with high precision requirements, symmetrical processing is generally adopted to balance the stresses on the opposite sides to a stable state, and the workpiece is smooth after processing. However, when a large amount of knife is taken in a certain process, the workpiece will be deformed due to the loss of balance between tensile stress and compressive stress.
The deformation of thin-walled parts during turning is multifaceted. The clamping force when clamping the workpiece, the cutting force when cutting the workpiece, and the elastic deformation and plastic deformation generated by the workpiece hindering the cutting of the tool will increase the temperature of the cutting zone and produce thermal deformation. Therefore, when we rough machining, the amount of back-grabbing and feed can be larger; for finishing, the amount of knife is generally 0.2~0.5mm, and the feed is generally 0.1~0.2mm/r, or even smaller , The cutting speed is 6~120m/min, and the cutting speed is as high as possible when finishing turning, but it is not easy to be too high. Reasonably choose the cutting amount to achieve the purpose of reducing part deformation.

4. Stress and deformation after processing
After processing, the part itself has internal stress. The distribution of these internal stresses is a relatively balanced state. The shape of the part is relatively stable. However, the internal stress changes after removing some materials and heat treatment. At this time, the workpiece needs to reach the balance of force again, so the shape is Has changed. This kind of deformation can be solved by heat treatment, stack the workpiece to be straightened to a certain height, use a certain tooling to compact it into a straight state, and then put the tooling and the workpiece into the heating furnace together. Choose according to the different parts materials Different heating temperature and heating time. After hot straightening, the internal organization of the workpiece is stable. At this time, the workpiece not only has a higher straightness, but also the work hardening phenomenon is eliminated, which is more convenient for further finishing of the parts. Castings need to be aging treatment, try to eliminate internal residual stress, and use the method of deforming and then processing, that is, rough machining-aging-reprocessing. For large parts, it is necessary to use profiling processing, that is, predict the deformation of the workpiece after assembly, and reserve the deformation in the opposite direction during processing, which can effectively prevent the deformation of the parts after assembly.

To sum up, for easily deformable workpieces, corresponding countermeasures must be adopted in the blank and processing technology. It is necessary to analyze different situations and find a suitable process route. Of course, the above method only further reduces the deformation of the workpiece. If you want to obtain a more precise workpiece, you need to continue to learn, discuss and research.


